
Enhanced Features
The Bulk Upload Conversion Tool has been enhanced to enable the system to select the best Source Trust claim. The system will take into consideration a number of factors with the objective of expediting processing of the newly submitted claim. To expedite processing, we recommend that your firm takes advantage of the System Specified feature when converting existing claims via the Bulk Upload Conversion Tool. You will still have the option of ignoring this feature and converting your preferred Source Trust claim.
To schedule a training webinar, please contact our Websupport department, Monday through Friday, 8:00AM to 4:30PM EST at 866.665.5790 or websupport@wrgraceasbestostrust.com.
Objective
The Bulk Upload Conversion tool allows firms to convert existing claims in mass. The following tutorial will briefly describe the steps in downloading a Microsoft Access template in order to begin the conversion process. Click on any image to enlarge it.
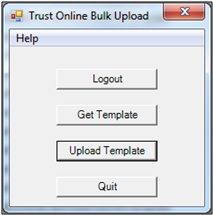
1) To begin converting claims, first log into the Bulk Upload tool and click on the Get Template button.
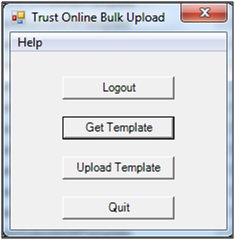
2) The “Choose Template” box will appear with a list of templates that are available for downloading. Click on the “Convert Existing Claims” template to download it.
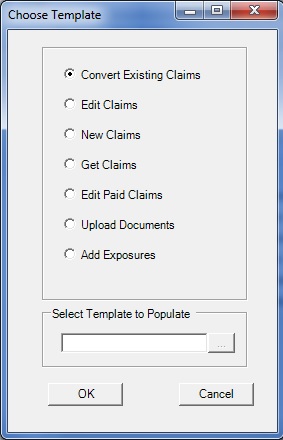
3) The “Choose Primary Trust” box will appear with a drop-down of Trust that the user has access too. Select the Trust for the new claims submissions.

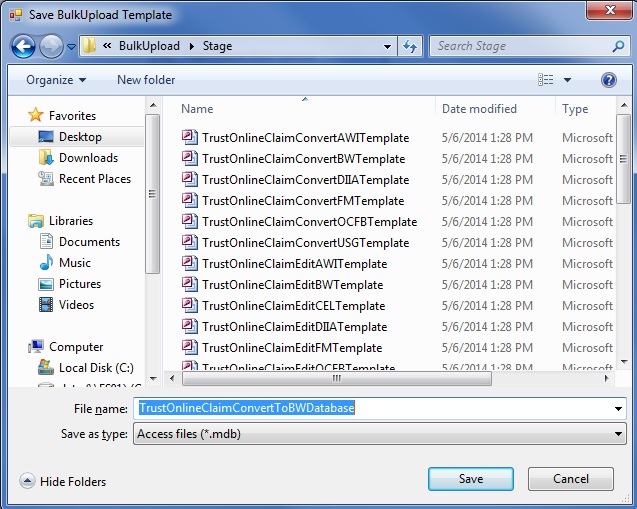
4) After selecting the Trust and clicking the OK button. A “Save BulkUpload Template” box will appear prompting the user to save the new template. At this point the user may rename the file or leave the default name and select the directory where the new template will be stored.
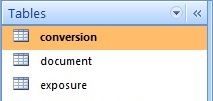
5) After downloading the new template, double click on the file to open it. Find the tables located in the Tables view of the Access database and open the conversion table to begin entering data. The conversion table is the only table in this template that must be populated. If you have additional documents and exposures pertaining to the new claims, you may enter them in the tables provided.
6) To convert claims, the user will need only the Source claim numbers that will be used in the conversion process. The attorneyid, injuryid and injurydate do not have to be entered unless the values are changing from what they were on the original source claim. For example, you may convert a non-malignant claim to a new claim and upgrade the disease to a malignancy by entering the new disease in the injuryid.
![]()
7) The claims used as the Source claim can be any claim that the user has access too. Although any claim can be used as the source, you may only convert to one Trust at a time.
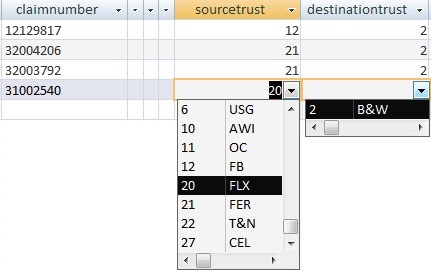
8) Now the system will use the Source claim entered by the user in the Conversion table, but they may take advantage of the Enhanced Conversion Process by electing to have the system specify the best claim to use in the conversion process by checking the bit labeled “usesystemspecifiedclaim“.
![]()
9) When the user sets this bit to allow the system to select the Source Trust claim, the “linked” field option may not be available depending upon the status and queue of the claim selected by the system. If the system selected a claim has an open release, the process will fail and a message stating that fact will be displayed in the READONLY_results table.
![]()
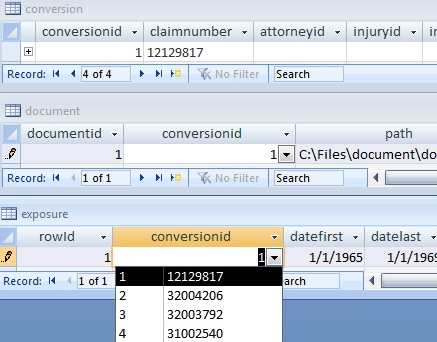
10) After entering all of the necessary data in the conversion table, you may supplement the new claims with additional exposure and documents. As you can see, the claim numbers only appear in the ‘conversionid’ once they have been entered in the conversion table.
11) After entering all of the information into the necessary tables, close the template. Log back into the Bulk Upload Tool and click on the Upload Template Button.
12) The “Upload BulkUpload Database” box will open, prompting the user to select the “Convert Existing Claims” template. After selecting the correct template, click “Open” to begin uploading the new exposure records.
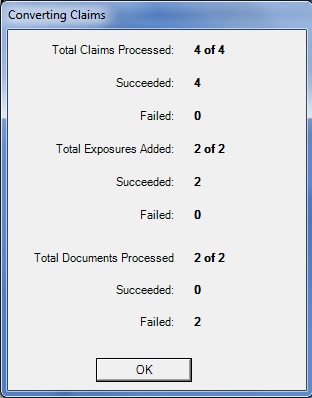
13) The “Converting Claims” box will display the total number of claims that were successfully converted as well as the ones that failed. The next two sections display the number of exposures and documents that were successful and the number of exposures and documents that failed.
For the failed exposures and documents, open the template and their respective tables and check the message field which will provide a brief description of why they failed. On each of the documents table, you will see the following fields. After correcting the failed uploads, log back into the Bulk Upload tool and re-upload the conversion template with the corrections.

14) If the user elected to have the system specify the Source claim, the READONLY_results table will still display the Source claim entered by the user with a message stating that they must check the Conversion Summary document on the newly converted claim to view the system selected claim number.
![]()
You have completed the Bulk Upload Conversion Tutorial. We hope that the lesson was informative and helpful. If you would like additional assistance, please contact the Trust at (866) 665-5790. For a printer friendly version of this tutorial click on the link below.
Bulk Upload Conversion – Tutorial
BACK TO TUTORIALS